Forensics timeline using plaso log2timeline for Windows

As you may know, the popular tool log2timeline can be also used directly on Windows. But the question is, why do I need to use log2timeline on windows? The answers is quite easy, for performance purpose.

log2timeline is a fantastic tools, but the process of creating a forensics timeline can be long and time consuming, for this reason I prefer instead of using a virtualized enviroment, to use directly log2timeline for Windows.

In this guide, we will do a timeline using log2timeline for Windows.

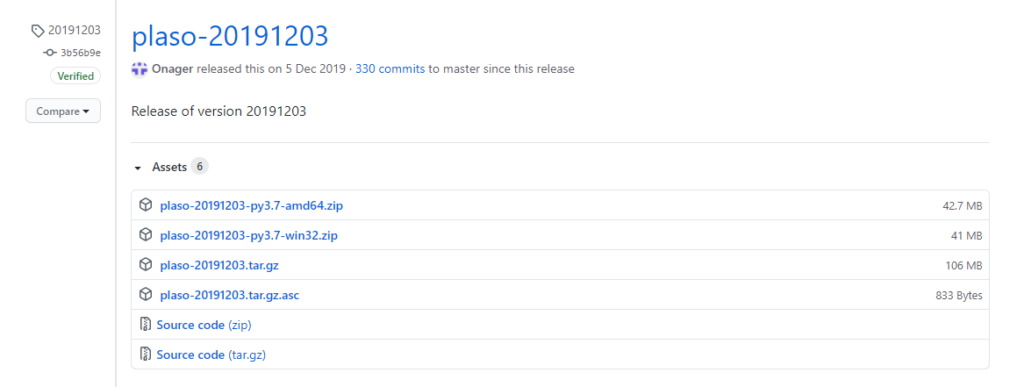
First of all, let’s download the Windows version of plaso from the official Github repo (https://github.com/log2timeline/plaso/releases), then just look for the Windows 32 or 64.

Plaso for Windows

After the download, unzip the files, now you are ready to use plaso.

Let’s made our first timeline under Windows.

  • Open a cmd with administrator privileges, then move to the directory where you extracted plaso.
  • Use log2timeline.exe to gather the timeline data from your image.
log2timeline.exe plaso.dump drive_d.dd
  • Command explanation:
    • plaso.dump is the output file
    • drive_d.dd is the bitestream copy of the drive of which you want to create a timeline

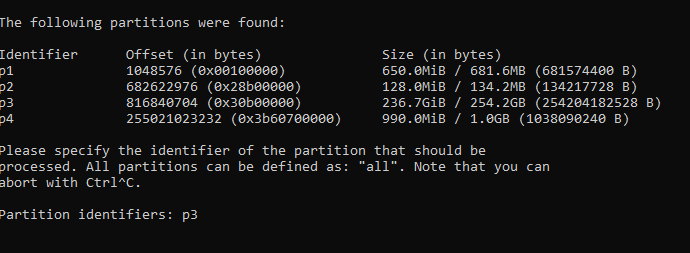
  • You may choose the partition on which you want that log2timeline will collect data, in my case is p3 as you can see in the picture below.
Select log2timeline partition
  • You may also choose the vss (Volume Snapshot Service) that you want to include in your timeline. Press enter if you don’t want to include any vss.
  • Wait until the process is completed, it can last several hours.
  • When the process is finished you can run isort.exe for filter the timeline data.
psort.exe -z "UTC" -o L2tcsv plaso.dump "date > '2020-09-01 00:00:00' AND date < '2012-10-15 00:00:00'" -w timeline.csv
  • Command explanation:
    • -z is the timezone, in this case UTC
    • -o is the output time, in this case CSV
    • plaso.dump is the file created with log2timeline
    • date (YYYY-MM-DD HH:MM:SS) is the timeslot on which you want to create the timeline.
    • -w timeline.csv is the output CSV file

  • Now you have the CSV, with the data of your timeline.
  • For a better visualization import the csv into the xlsx file created by Rob Lee, that you can find at this link: https://www.sans.org/blog/digital-forensic-sifting-colorized-super-timeline-template-for-log2timeline-output-files/
  • Enjoy your first windows created timeline!

Find out Windows installation date

There are a lot of ways to determine when a Windows operating system have been installed on a machine. In this post you will find some examples.

The installation date is very important during a forensic invegation in order to quickly understand when a Windows operating system have been installed on the analyzed machine.

Please bare in mind, that on Windows 10, this date can refer to the last major update (e.g. creators update).

      1. Extraction from Windows registry with Powershell:

        It is possible to retrieve the date and the time directly from a registry which is:

        HKEY_LOCAL_MACHINE\SOFTWARE\Microsoft\Windows NT\CurrentVersion\InstallDate

        The value of the registry key “InstallDate” is expressed as UNIX time, in a few words, it displays the time in number of seconds since 1st Jan 1970.
        You can obtain a readeable value with Powershell, writing:

        $date = Get-ItemProperty -Path 'HKLM:\SOFTWARE\Microsoft\Windows NT\CurrentVersion\' | select -ExpandProperty InstallDate

        The variable $date contains the installation datetime in UNIX time. In order to convert it into a human readable format in the same Powershell, you shall write:

        (Get-Date "1970-01-01 00:00:00.000Z") + ([TimeSpan]::FromSeconds($date))

        Now you have a human readable installation date time.

        Requirement: Powershell
        SO: Windows 7+

        Extracting from Windows registry with Powershell
      2. Using systeminfo via CMD:

        Systeminfo displays configuration information about a computer and its operating system, and also the Original Installation Date. To extract the installation date, open a cmd and type:

        systeminfo | find /i "original"

        Using the string “Original Install Date” please note that in order to find valid information, your OS language shall be English, otherwise you may not be able to find anything.
        Requirement: cmd
        SO: Windows XP+

      3. Using WMI via Powershell:

        It is also possible to extract the installation date and time with WMI, which stands for “Windows Management Instrumentation“. Open a powershell windows and write this command:

        ([WMI]'').ConvertToDateTime((Get-WmiObject Win32_OperatingSystem).InstallDate)

        With this command, you will get the installation date in a human readable format.
        Requirement: Powershell
        SO: Windows 7+

      4. Client side Cache Folder on Windows 10:

        On Windows 10, all the methods listed before, could retrieve the date of the last major updates (e.g. creators update) and not the Original Installation date.
        A nice way to find the closest thing to the original installation date on a Windows 10 system is to look at the “last write time” of the client side cache and you can do it by using powershell:

        Get-Item C:\Windows\CSC\


        The “Last Write Time” is one of the closest things to the original installation date of the system.
        Please refer also to this interesting discussion.

        Requirement: Powershell
        SO: Windows 10

If you use other methods to get the installation date, please share them in the comment box.